
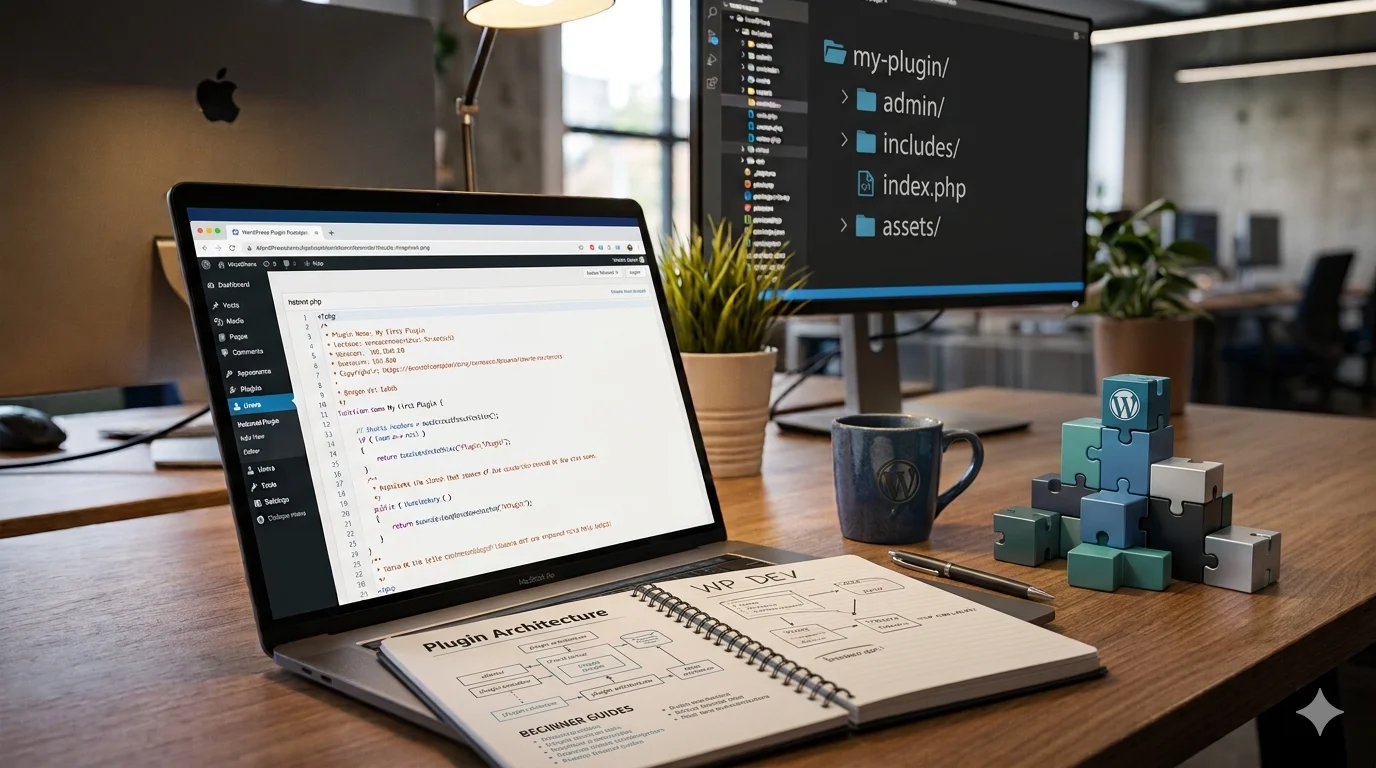
WordPress plugin development lets you add custom functionality to WordPress without changing WordPress core files. A plugin can be as simple as one PHP file or grow into a larger system with settings, admin screens, custom post types, APIs, JavaScript, and other components.
For beginners, the best approach is to start with one small feature and learn how WordPress detects the plugin, how hooks connect your code to WordPress, how settings are stored, and how input and output should be handled safely.
In this guide, we will build a simple Custom Notice Plugin. It will let an administrator save a notice in WordPress and display that notice anywhere using a shortcode.
Along the way, you will learn the foundations of WordPress plugin development, including plugin structure, headers, hooks, settings, sanitization, escaping, security, and testing.
What Is WordPress Plugin Development?
A WordPress plugin is a package of code that extends or changes WordPress functionality. Plugins can add features such as:
- Contact forms
- Custom post types
- Membership systems
- Payment integrations
- SEO tools
- Admin features
- REST API endpoints
- Ecommerce functionality
- Custom shortcodes
- Integrations with third-party services
The official WordPress Plugin Handbook describes plugins as code packages that extend WordPress core functionality. Plugins are typically written in PHP but can also contain JavaScript, CSS, images, and other assets.
WordPress also recommends that developers avoid editing core files. Core changes can be overwritten by WordPress updates, so custom functionality should normally be added through plugins, themes, hooks, and supported APIs. See the Introduction to Plugin Development for the official guidance.
Theme vs Plugin: What Is the Difference?
Themes and plugins can both contain PHP, JavaScript, and CSS, but their primary responsibilities are different.
| Theme | Plugin |
| Primarily controls presentation | Primarily adds functionality |
| Handles templates and layouts | Adds features and behavior |
| Changes the visual experience | Extends WordPress capabilities |
| Often tied to design | Usually designed to work independently of theme |
For example, changing the blog post layout belongs naturally in a theme, while creating a custom booking system belongs more naturally in a plugin. There are exceptions, but this separation is a useful development principle.
What You Need Before You Start
- a local or development WordPress installation
- a code editor
- basic PHP knowledge
- basic HTML knowledge
- basic understanding of WordPress Admin
- access to the wp-content/plugins directory
- a browser for testing
- a safe environment that is not your production website
If you are still learning the overall development path, follow our WordPress developer roadmap before moving into more advanced plugin architecture.
Do You Need Advanced PHP?
No. For your first plugin, you should understand variables, arrays, conditions, functions, function parameters, return values, and basic PHP syntax. Object-oriented PHP becomes useful as plugins become larger, but it is not required for the simple plugin we will build here.
WordPress Plugin Structure Explained
A plugin can technically be only one PHP file. However, larger plugins are usually divided into multiple files and folders. A simple structure might look like this:
custom-notice-plugin/
├── custom-notice-plugin.php
├── includes/
├── admin/
├── public/
└── assets/
| Component | Purpose |
| Main PHP file | Entry point for the plugin |
| includes/ | Shared PHP functionality |
| admin/ | Admin-only functionality |
| public/ | Frontend functionality |
| assets/ | CSS, JavaScript and images |
For our beginner project, we will keep everything in one file first. That makes it easier to understand how the pieces connect.
Build Your First WordPress Plugin
Our plugin will do four things:
- Register itself with WordPress.
- Create a settings page in the WordPress Admin.
- Allow an administrator to save a notice.
- Display the notice using [custom_notice].
This project is intentionally small, but it teaches several core concepts used in larger plugins.
Step 1: Create the Plugin Folder and Main File
Go to:
wp-content/plugins/
Create a folder named:
custom-notice-plugin
Inside that folder, create:
custom-notice-plugin.php
Your structure should now be:
wp-content/
└── plugins/
└── custom-notice-plugin/
└── custom-notice-plugin.php
WordPress scans the plugins directory and looks for PHP files containing valid plugin header information.
Step 2: Add the Plugin Header
Open custom-notice-plugin.php and add:
<?php
/**
* Plugin Name: Custom Notice Plugin
* Description: Adds a configurable notice that can be displayed using a shortcode.
* Version: 1.0.0
* Author: Your Name
*/
if ( ! defined( ‘ABSPATH’ ) ) {
exit;
}
At minimum, WordPress requires the plugin header to contain a plugin name. Other fields such as description, version, author, and text domain can also be added. See the official Plugin Header Requirements.
The ABSPATH guard is a simple defensive check that stops this PHP file from being executed directly outside WordPress.
Save the file, then open WordPress Admin → Plugins. You should see Custom Notice Plugin. Activate it. At this point the plugin does nothing yet, but WordPress recognizes it as a valid plugin.
Step 3: Add Basic Plugin Functionality
Now add a function that retrieves the notice stored in WordPress:
function ctg_get_notice() {
return get_option( ‘ctg_custom_notice’, ” );
}
We use the ctg_ prefix to reduce the chance that another theme or plugin uses the exact same function name.
Why Prefix Plugin Functions?
WordPress sites can run many plugins at once. A generic name such as get_notice() could conflict with another plugin defining the same function. Using a consistent prefix makes collisions less likely. For larger plugins, namespaces or classes can provide stronger organization.
Step 4: Understand WordPress Hooks
Hooks are central to WordPress plugin development. They let your plugin connect to WordPress at predefined points without changing WordPress core. There are two main types: actions and filters.
The official WordPress Hooks documentation explains how plugins and themes interact with WordPress through hooks.
What Are Actions?
Actions allow your code to run when something happens. For example:
add_action( ‘admin_menu’, ‘ctg_add_settings_page’ );
This means: when WordPress runs the admin_menu action, run our ctg_add_settings_page() function. Actions are often used for adding admin menus, loading scripts, saving data, registering content types, and performing setup tasks.
What Are Filters?
Filters modify a value and return the changed value. For example:
function ctg_modify_text( $text ) {
return $text . ‘ Extra text’;
}
| Actions | Filters |
| Perform a task | Modify data |
| Trigger functionality | Transform a value |
| Normally do not return a value to the action | Return the modified value |
Step 5: Create a WordPress Admin Settings Page
We now need somewhere for administrators to enter the notice. Add:
function ctg_add_settings_page() {
add_options_page(
‘Custom Notice’,
‘Custom Notice’,
‘manage_options’,
‘ctg-custom-notice’,
‘ctg_render_settings_page’
);
}
add_action( ‘admin_menu’, ‘ctg_add_settings_page’ );
This adds a new page under Settings → Custom Notice. The manage_options capability restricts access to users who are allowed to manage site settings.
Now create the page output:
function ctg_render_settings_page() {
?>
<div class=”wrap”>
<h1>Custom Notice</h1>
<form method=”post” action=”options.php”>
<?php
settings_fields( ‘ctg_notice_group’ );
do_settings_sections( ‘ctg-custom-notice’ );
submit_button();
?>
</form>
</div>
<?php
}
The form uses WordPress’s Settings API instead of a completely custom save system.
Step 6: Register and Sanitize the Plugin Setting
Add this code:
function ctg_register_settings() {
register_setting(
‘ctg_notice_group’,
‘ctg_custom_notice’,
array(
‘sanitize_callback’ => ‘sanitize_textarea_field’,
)
);
add_settings_section(
‘ctg_notice_section’,
‘Notice Settings’,
‘__return_false’,
‘ctg-custom-notice’
);
add_settings_field(
‘ctg_notice_field’,
‘Notice Text’,
‘ctg_notice_field_callback’,
‘ctg-custom-notice’,
‘ctg_notice_section’
);
}
add_action( ‘admin_init’, ‘ctg_register_settings’ );
The official Settings API documentation provides a standard way to register settings, sections, and fields in the Admin area.
Now add the input field:
function ctg_notice_field_callback() {
$notice = get_option( ‘ctg_custom_notice’, ” );
?>
<textarea
name=”ctg_custom_notice”
rows=”5″
cols=”50″
><?php echo esc_textarea( $notice ); ?></textarea>
<?php
}
Now visit Settings → Custom Notice. You should see a text field and Save Changes button.
Sanitization vs Escaping
| Sanitization | Escaping |
| Cleans incoming data | Makes outgoing data safe for its output context |
| Usually happens before storage or use | Happens when data is rendered |
| Example: sanitize_text_field() | Example: esc_html() |
A useful rule is: sanitize as early as practical and escape as late as possible at output time. Different contexts require different escaping functions such as esc_html(), esc_attr(), esc_url(), and esc_textarea().
See the official WordPress Escaping Data guide for context-specific guidance.
Step 7: Display the Notice With a Shortcode
Now create a shortcode:
function ctg_notice_shortcode() {
$notice = ctg_get_notice();
if ( empty( $notice ) ) {
return ”;
}
return ‘<div class=”ctg-custom-notice”>’
. esc_html( $notice )
. ‘</div>’;
}
add_shortcode( ‘custom_notice’, ‘ctg_notice_shortcode’ );
You can now add [custom_notice] inside a WordPress post or page. WordPress will replace the shortcode with the stored notice. If the administrator changes the notice in Settings → Custom Notice, the frontend output will update automatically.
Why Return Instead of Echo?
Shortcode callbacks should return their output instead of echoing it directly. The official Shortcode API documentation follows this pattern because returned content can be inserted at the correct position in the post or page.
Step 8: Add Basic Security
Security should influence how you write the plugin from the beginning. For this plugin:
- the setting is sanitized before storage
- saved text is escaped before output
- the settings page uses the manage_options capability
- the standard Settings API form flow uses options.php and WordPress-generated fields
The Settings API helps handle the standard options form flow, including nonce and capability checks through options.php. However, custom actions, AJAX handlers, REST endpoints, and custom forms still need their own permission and request validation.
Use Nonces Where Appropriate
Nonces help verify that a request originated from an expected WordPress context, but they are not a replacement for authentication or authorization. Sensitive actions should still use capability checks such as current_user_can(). See the WordPress Nonces documentation.
Step 9: Test Your Plugin Properly
A plugin is not finished simply because it activates. Test it systematically.
- Activation: plugin activates without PHP warnings or fatal errors.
- Admin settings: settings page appears and values persist after saving.
- Frontend output: [custom_notice] displays correctly and empty content produces no unwanted output.
- Permissions: unauthorized users cannot manage plugin settings.
- Error handling: check WordPress debug logs, PHP logs, and the browser console in a development environment.
Do not use your production website as the primary development environment.
Complete Custom Notice Plugin Code
After following the steps above, your complete beginner plugin can look like this:
<?php
/**
* Plugin Name: Custom Notice Plugin
* Description: Adds a configurable notice that can be displayed using a shortcode.
* Version: 1.0.0
* Author: Your Name
*/
if ( ! defined( ‘ABSPATH’ ) ) {
exit;
}
function ctg_get_notice() {
return get_option( ‘ctg_custom_notice’, ” );
}
function ctg_add_settings_page() {
add_options_page(
‘Custom Notice’,
‘Custom Notice’,
‘manage_options’,
‘ctg-custom-notice’,
‘ctg_render_settings_page’
);
}
add_action( ‘admin_menu’, ‘ctg_add_settings_page’ );
function ctg_render_settings_page() {
?>
<div class=”wrap”>
<h1>Custom Notice</h1>
<form method=”post” action=”options.php”>
<?php
settings_fields( ‘ctg_notice_group’ );
do_settings_sections( ‘ctg-custom-notice’ );
submit_button();
?>
</form>
</div>
<?php
}
function ctg_register_settings() {
register_setting(
‘ctg_notice_group’,
‘ctg_custom_notice’,
array(
‘sanitize_callback’ => ‘sanitize_textarea_field’,
)
);
add_settings_section(
‘ctg_notice_section’,
‘Notice Settings’,
‘__return_false’,
‘ctg-custom-notice’
);
add_settings_field(
‘ctg_notice_field’,
‘Notice Text’,
‘ctg_notice_field_callback’,
‘ctg-custom-notice’,
‘ctg_notice_section’
);
}
add_action( ‘admin_init’, ‘ctg_register_settings’ );
function ctg_notice_field_callback() {
$notice = get_option( ‘ctg_custom_notice’, ” );
?>
<textarea
name=”ctg_custom_notice”
rows=”5″
cols=”50″
><?php echo esc_textarea( $notice ); ?></textarea>
<?php
}
function ctg_notice_shortcode() {
$notice = ctg_get_notice();
if ( empty( $notice ) ) {
return ”;
}
return ‘<div class=”ctg-custom-notice”>’
. esc_html( $notice )
. ‘</div>’;
}
add_shortcode( ‘custom_notice’, ‘ctg_notice_shortcode’ );
Save the file, activate the plugin, enter a notice under Settings → Custom Notice, and place [custom_notice] in a page or post. This example is intentionally small so you can understand each part before adding more advanced architecture.
When Should You Split a Plugin Into Multiple Files?
Our plugin is small enough to remain in one file. As the plugin grows, one large file becomes difficult to maintain. You may eventually use:
custom-notice-plugin/
├── custom-notice-plugin.php
├── includes/
│ ├── functions.php
│ └── shortcode.php
├── admin/
│ └── settings.php
├── public/
│ └── frontend.php
└── assets/
├── css/
└── js/
There is no rule that every plugin must use this exact structure. The purpose is separation of responsibilities. Do not create a complicated architecture for a plugin containing only a few lines of code.
Common WordPress Plugin Development Mistakes
1. Editing WordPress Core Files
Core updates can overwrite your changes. Use plugins, hooks, and documented APIs instead.
2. Trusting User Input
Never assume submitted data is safe. Validate and sanitize incoming values.
3. Not Escaping Output
Stored data should still be escaped according to where it is displayed.
4. Using Generic Function Names
Names such as save_data() or get_settings() increase collision risk. Use prefixes, namespaces, or classes.
5. Putting Everything in One Huge File
One-file plugins are fine when they are genuinely small. Large plugins should separate responsibilities.
6. Testing Directly on Production
A syntax error can take down a live site. Develop locally or in staging.
7. Loading Assets Everywhere
Load CSS and JavaScript only where they are needed when practical.
8. Copying Code Without Understanding It
A snippet can be outdated, insecure, or built for a different context. Understand it before using it.
9. Ignoring Capability Checks
Being logged in does not mean a user should be allowed to perform every administrative action.
WordPress Plugin Development Best Practices
- Use descriptive names
- Prefix functions or use namespaces
- Use WordPress hooks
- Prefer WordPress APIs where appropriate
- Sanitize input
- Escape output
- Check capabilities
- Use nonces where necessary
- Keep code modular
- Document complex logic
- Use Git
- Test locally
- Avoid editing WordPress core
- Follow WordPress Coding Standards where practical
For deeper standards, see the official WordPress Coding Standards.
How to Debug a WordPress Plugin
Debugging is a major part of plugin development. When something fails, avoid making random changes. Use a repeatable process:
1. Reproduce the problem and identify the exact action that triggers it.
2. Check PHP and WordPress debug logs in a development environment.
3. Check the browser console and network requests for JavaScript or request failures.
4. Temporarily disable conflicting plugins if necessary.
5. Verify that the correct hook and callback are being used.
6. Inspect the stored and returned data one assumption at a time.
Debugging becomes much faster when you isolate one assumption at a time.
How to Turn This Beginner Plugin Into a Portfolio Project
Instead of abandoning the Custom Notice Plugin after this tutorial, extend it gradually:
- Version 1: settings page, saved notice, shortcode.
- Version 2: notice title, style option, enable/disable toggle.
- Version 3: modular files, stronger capability checks for custom actions, conditional asset loading.
- Version 4: notice categories, custom post type, scheduling.
- Version 5: REST API endpoint, block editor integration, JavaScript interface, uninstall cleanup.
By extending one working plugin, you learn why larger plugin architectures exist instead of repeatedly starting beginner tutorials from scratch.
What to Learn After Your First Plugin
Once you can build and understand a simple plugin, continue with:
- advanced PHP
- object-oriented programming
- WordPress Coding Standards
- custom post types
- taxonomies
- metadata
- user roles and capabilities
- REST API
- AJAX
- scheduled tasks
- custom database tables
- block development
- testing
- Composer and dependency management
If you want to understand where these skills fit into the wider learning path, return to our WordPress developer roadmap.
Developers interested in ecommerce can also move into WooCommerce customization after mastering the fundamentals. Our WooCommerce tutorial for beginners provides a useful starting point for understanding that ecosystem.
WordPress Plugin Development Checklist
- Plugin folder created
- Main PHP file created
- Plugin header added
- Plugin appears in WordPress Admin
- Plugin activates without errors
- Functions use safe naming
- Actions and filters are understood
- Settings registered correctly
- Input is sanitized
- Output is escaped
- Permissions are appropriate
- Shortcode works
- Empty values are handled
- Plugin tested locally
- Debug logs checked
- Code is organized enough for its current size
Do not use this checklist merely as a set of boxes to tick. Make sure you understand why each item exists.
Frequently Asked Questions
Is WordPress plugin development difficult?
Basic plugin development is accessible if you already understand basic PHP and WordPress. Complex plugins can involve databases, APIs, JavaScript, security, architecture, performance, and other advanced topics. Start small and increase complexity gradually.
Do I need PHP to develop WordPress plugins?
PHP remains a core language for WordPress plugin development. Plugins may also use JavaScript, CSS, HTML, SQL, and other technologies depending on their functionality.
Can I create a WordPress plugin without coding?
Some tools can generate functionality without manually writing much code, but custom plugin development requires programming knowledge if you want to understand, maintain, debug, and secure the result properly.
What language is used for WordPress plugin development?
PHP is the main server-side language used in WordPress plugins. Plugins can also include JavaScript, HTML, CSS, and SQL. Modern projects may also use JavaScript build tools and other development technologies.
Where are WordPress plugins stored?
Plugins are normally stored under wp-content/plugins/. Each plugin commonly has its own folder.
What is the difference between a WordPress theme and plugin?
A theme primarily controls site presentation, templates, and visual output. A plugin primarily adds or changes functionality. There can be overlap, but separating appearance from functionality usually makes projects easier to maintain.
How do WordPress hooks work?
Hooks let your code connect to specific points in WordPress. Actions perform tasks at those points, while filters receive data, modify it, and return the modified value.
Should a WordPress plugin use one file or multiple files?
A very small plugin can use one PHP file. Larger plugins should generally separate functionality into logical files or components as complexity increases.
How do I test a custom WordPress plugin?
Test on a local or staging environment. Verify activation, settings, permissions, frontend output, invalid input, PHP errors, JavaScript errors, and interactions with other plugins. Do not rely only on successful activation.
Final Thoughts
WordPress plugin development becomes much easier once you understand how a few core pieces fit together. A plugin needs an entry point. WordPress recognizes it through its plugin header. Hooks connect your functionality to WordPress. APIs help you work with settings and other WordPress data. Sanitization, escaping, capabilities, and nonces help protect your functionality.
The most useful next step is not to memorize more functions. Build something. Start with a small plugin like the Custom Notice Plugin, test it, break it, debug it, then add one new feature at a time. That process will teach you much more than copying increasingly complicated plugin examples without understanding how they work.
