
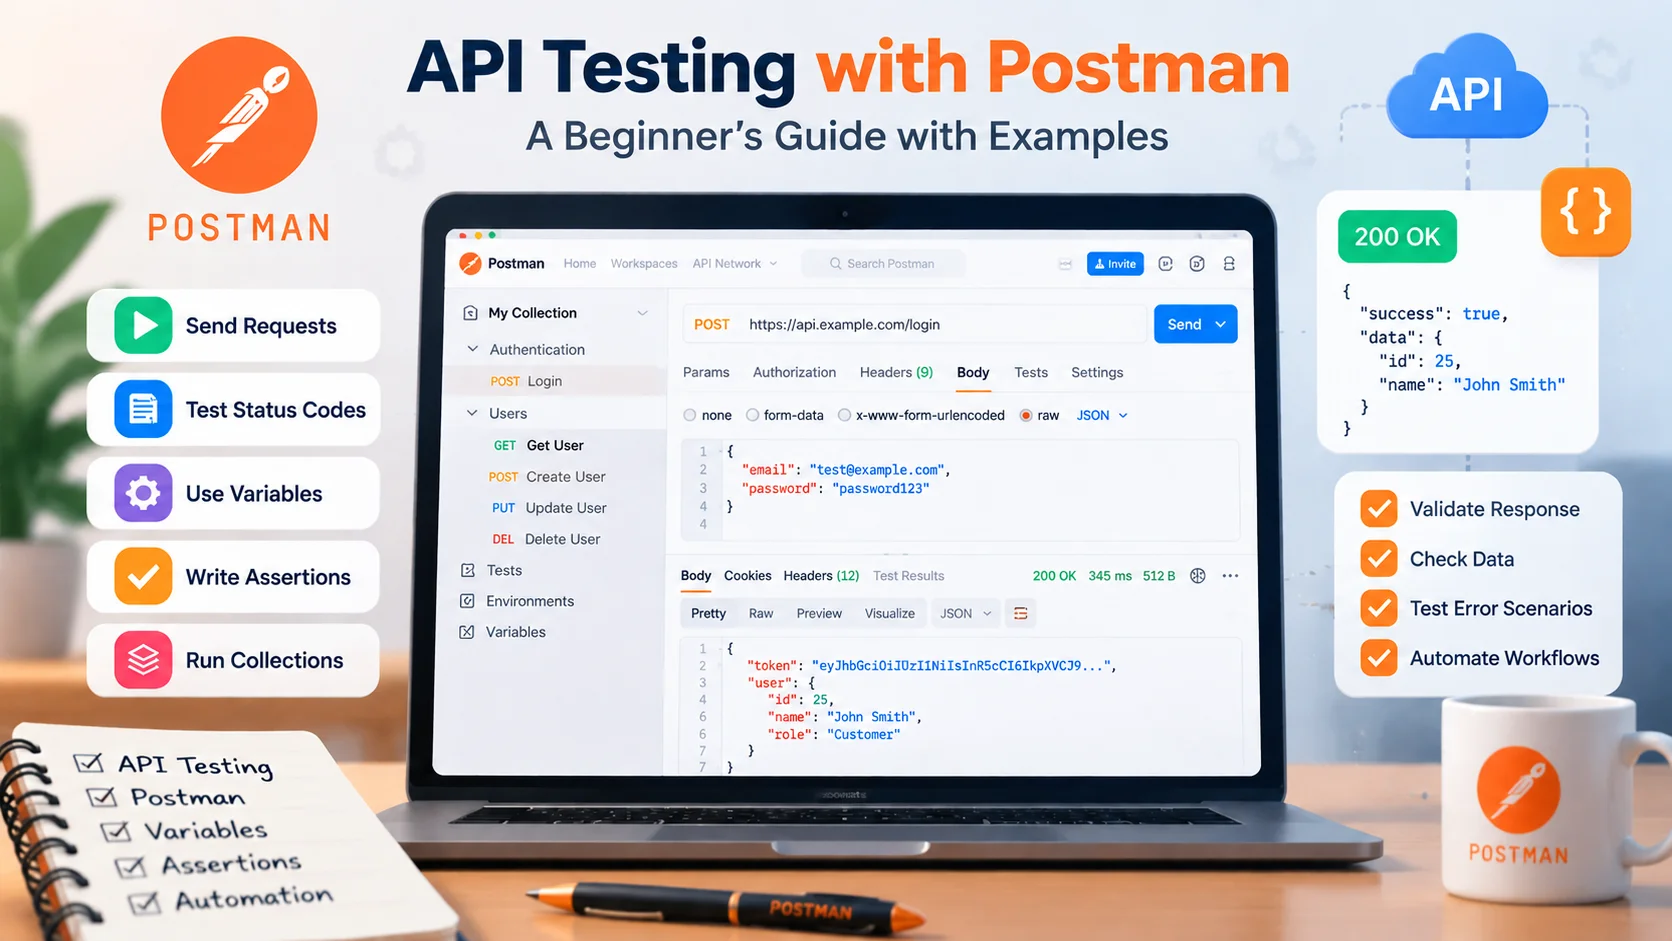
Many beginners learn Postman by entering an API URL, clicking Send, seeing a successful response, and assuming the API works. Real API testing goes further. A QA engineer needs to verify whether the API returns the correct status, data, errors, permissions, and business behavior for both valid and invalid requests.
In this tutorial, you will learn API testing with Postman from the basics through a practical workflow using requests, assertions, variables, collections, and request chaining.
What Is API Testing?
API testing with Postman helps QA engineers check whether an application programming interface behaves according to its expected requirements and business rules. A typical test sends a request to an endpoint and evaluates the response.
Depending on the API, QA may verify:
- HTTP status codes
- response data
- required fields
- headers
- authentication
- authorization
- error handling
- business rules
- response structure
A successful status code does not automatically mean an API is correct.
For example, GET /users/25 might return 200 OK but contain data for the wrong user. The request succeeded at the HTTP level, but the business behavior is incorrect.
What Should a QA Engineer Test in an API?
Before sending a request, ask:
- What should happen with valid input?
- What should happen with invalid input?
- Which fields are required?
- What status should be returned?
- What data should appear in the response?
- What happens without authentication?
- Can every user access this resource?
- What happens at minimum and maximum values?
API testing is about validating behavior, not simply checking whether the server responds.
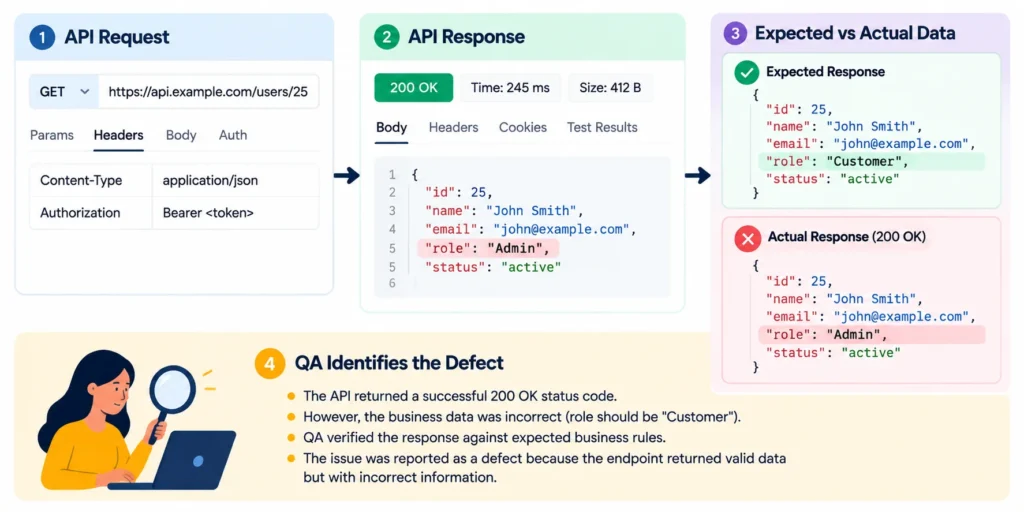
Finding a Business Logic Defect Behind a Successful API Response
During API testing, I found an issue where an API returned a successful 200 OK status code, but the response data did not match the expected business rules.
The expected result was that the user details endpoint should return the correct user information along with the appropriate role permissions. However, the API returned valid JSON data with an incorrect role value.
Expected Response:
{
“id”: 25,
“name”: “John Smith”,
“role”: “Customer”
}
Actual Response:
{
“id”: 25,
“name”: “John Smith”,
“role”: “Admin”
}
The API request was technically successful because it returned a 200 OK status, but the business data was incorrect. I identified the defect by comparing the response values against the expected requirements instead of validating only the status code.
This helped highlight why API testing should verify response data, business rules, and user permissions along with HTTP status codes.
What Is Postman?
Postman is a popular tool for API testing with Postman that allows you to create and send HTTP requests, inspect responses, organize requests into collections, use variables, and write JavaScript tests.
For beginners, it provides a practical way to understand how APIs work before moving into larger code-based automation frameworks.
API Testing Basics You Need Before Using Postman
Endpoint
An endpoint identifies the API resource or operation you want to access.
GET https://api.example.com/users/123HTTP Methods
| Method | Typical Purpose |
| GET | Retrieve data |
| POST | Submit data or create a resource |
| PUT | Replace a resource |
| PATCH | Partially update a resource |
| DELETE | Delete a resource |
The exact behavior depends on the API specification.
Headers
Headers provide additional information about the request.
Content-Type: application/json
Authorization: Bearer <token>
Query Parameters and Path Parameters
A path parameter appears inside the resource path:
/users/25
A query parameter normally appears after ?:
/users?page=2
Request Body
POST, PUT, and PATCH requests often send data in a request body.
{
“name”: “Sara”,
“job”: “QA Engineer”
}
HTTP Status Codes
| Code | Typical Meaning |
| 200 | OK |
| 201 | Created |
| 204 | Successful response with no content |
| 400 | Bad Request |
| 401 | Authentication required or failed |
| 403 | Forbidden |
| 404 | Not Found |
| 409 | Conflict |
| 422 | Unprocessable Content |
| 500 | Internal Server Error |
Always verify the expected status against the API’s actual contract rather than assuming every API behaves identically.
Set Up Postman
Install Postman or open your available Postman workspace.
For this tutorial, you mainly need to understand:
- request builder
- response viewer
- Collections
- Environments
- Scripts
You do not need to learn every Postman feature before sending your first request.
Send Your First GET Request
Create a new request and select GET.
This is the first practical step in API testing with Postman, where testers send requests and verify the returned response.
Enter a public practice API endpoint and click Send.
Postman will display the response returned by the server.
How to Read an API Response
Do not inspect only the JSON.
Check:
- HTTP status
- response body
- response headers
- expected fields
- expected values
- error information when applicable
Response time can also be reviewed, but only compare it against a meaningful requirement or expected threshold.
Test a POST Request
Now test creating data.
Select POST, enter the required endpoint, and add JSON under the request body.
{
“name”: “Sara”,
“job”: “QA Engineer”
}
If the API expects JSON, confirm that the request uses:
Content-Type: application/json
What Should You Validate?
Check more than the status code.
- the resource was created
- returned values are correct
- required generated fields exist
- incorrect input is rejected appropriately
- the response follows the API contract
Test PUT and PATCH Requests
PUT and PATCH are commonly used to update resources, depending on how the API is designed.
{
“job”: “Senior QA Engineer”
}
Verify that:
- the correct resource changed
- the expected field contains the new value
- unrelated data remains correct where applicable
- invalid resource IDs return the documented behavior
Do not assume PUT and PATCH mean exactly the same thing.
Test a DELETE Request
Send a DELETE request to the relevant resource.
Check:
- expected HTTP status
- expected response body if one exists
- whether the resource is actually removed
If supported by the API contract, send a GET request afterward and verify that the deleted resource can no longer be retrieved.
This creates a basic CRUD workflow: Create -> Read -> Update -> Delete
Test API Authentication in Postman
Many real APIs require authentication.
Two common examples are API keys and Bearer tokens.
A Bearer token may be sent as:
Authorization: Bearer {{access_token}}
Do not test only a valid token.
- no token
- invalid token
- expired token
- insufficient permission
Never place real production tokens, passwords, or API keys in tutorial screenshots or public collections.
Write API Tests and Assertions in Postman
Current Postman versions use Scripts -> Post-response for scripts that run after an API response.
Postman provides JavaScript APIs such as pm.test and pm.expect for assertions.
Validate the Status Code
pm.test(“Status code is 200”, function () {
pm.response.to.have.status(200);
});
Validate Response Data
const jsonData = pm.response.json();
pm.test(“User name is correct”, function () {
pm.expect(jsonData.name).to.eql(“Sara”);
});
Check That a Field Exists
pm.test(“Response contains an id”, function () {
const jsonData = pm.response.json();
pm.expect(jsonData).to.have.property(“id”);
});
Useful assertions may validate status, response values, required fields, headers, content type, error information, and business rules.
Do not add an arbitrary rule such as every request must respond within two seconds unless the project has an actual performance requirement.
Positive vs Negative API Testing
Beginners often test only successful scenarios. That leaves important defects undiscovered.
Positive testing uses expected valid input. Negative testing checks how the API handles invalid or unexpected situations.
| Scenario | What It Tests |
| Valid request | Normal business behavior |
| Missing required field | Input validation |
| Invalid data type | Data validation |
| Invalid resource ID | Error handling |
| Missing token | Authentication |
| Insufficient permission | Authorization |
| Duplicate record | Business rules |
| Boundary value | Limits and validation |
Both types are necessary for useful API coverage.
Organize Requests with Postman Collections
Collections group related API requests.
For example:
- Create User
- Get User
- Update User
- Delete User
This turns isolated requests into a reusable workflow.
Use Variables and Environments
Hardcoding URLs, IDs, and tokens makes tests difficult to reuse.
Instead of:
https://staging.example.com/api/usersyou can use:
{{base_url}}/users
Useful variables might include:
- base_url
- access_token
- user_id
Environments allow different values to be used for different contexts, such as testing and staging.
Build a Complete API Test Workflow
Now connect the requests together to create a complete API testing with Postman workflow.
Step 1: Create the User
Send the POST request and validate the response.
Step 2: Save the Returned ID
Under Scripts -> Post-response:
const data = pm.response.json();
pm.environment.set(“user_id”, data.id);
Step 3: Retrieve the User
GET {{base_url}}/users/{{user_id}}
Validate that the returned user matches what was created.
Step 4: Update the User
PATCH {{base_url}}/users/{{user_id}}
Check the updated values.
Step 5: Delete the User
DELETE {{base_url}}/users/{{user_id}}
Verify the documented deletion behavior.
Step 6: Verify the Result
If the API contract supports it, request the resource again and confirm the expected not-found behavior.
This is much closer to real API testing than manually clicking unrelated requests.
Using Postman Variables to Create a Reusable API Workflow
While testing a multi-step API workflow, I needed to verify multiple requests where the response from one API was required for the next request.
Initially, the process involved manually copying values such as user IDs from one response and pasting them into the following requests. This became repetitive and increased the chance of using incorrect values during repeated testing.
I used Postman variables to capture the required value from the first API response and reuse it in the next request.
For example, after creating a user, the API returned a unique user ID:
{
“id”: 125,
“name”: “Test User”
}
I stored this ID as a Postman variable and used it in the next request:
GET {{base_url}}/users/{{user_id}}This allowed the complete workflow to run consistently without manually updating IDs each time. It reduced repetitive work, improved test reliability, and made the API collection easier to execute and maintain.
Run the Entire Collection
Once your requests and assertions are organized, run them using the Collection Runner.
Review:
- which requests passed
- which assertions failed
- response errors
- variables passed between requests
- dependencies between requests
This moves your work from isolated manual requests toward a reusable API test suite.
API Test Automation and CI/CD with Postman
A useful progression is:
Manual request -> saved assertions -> collection -> repeatable collection run -> command line -> CI/CD
Postman CLI
The Postman CLI can run collections from the command line and integrate those tests into CI/CD pipelines.
What About Newman?
Newman is still available, but current Postman documentation recommends the Postman CLI for newer workflows.
Postman explains that Newman does not support newer capabilities such as Collection v3 and Native Git workflows introduced with Postman v12.
For a beginner starting a new workflow, it makes sense to understand the current Postman CLI rather than relying only on older Newman tutorials.
From Clicking Send to Real API Testing
| Beginner Approach | QA Testing Approach |
| Send request | Understand expected behavior |
| See 200 | Verify the correct status |
| Look at JSON | Assert important values |
| Test valid input | Test valid and invalid input |
| Hardcode URLs | Use variables |
| Test requests separately | Chain dependent requests |
| Run manually | Run a collection |
| Stop after success | Verify business behavior |
This mindset matters more than memorizing every Postman feature.
Common Postman API Testing Mistakes
Checking Only the Status Code
A successful status does not prove that the API returned the correct business data.
Testing Only Happy Paths
Test invalid values, missing fields, authentication failures, permissions, duplicates, and boundaries too.
Hardcoding URLs and Tokens
Use variables and environments.
Sharing Real Credentials
Do not expose API keys, passwords, or tokens in collections or screenshots.
Testing Without Understanding the API Contract
Assertions are useful only when you know what the correct behavior should be.
Adding Arbitrary Performance Limits
Only test against meaningful requirements.
Creating Unstructured Collections
Use clear folders, request names, variables, and workflows.
Improving an Unstructured Postman Collection
In one API testing workflow, I worked with a Postman collection where requests were added without a clear structure. The collection contained unclear request names, repeated endpoints, and hardcoded values such as IDs and tokens.
This made it difficult to understand the testing flow and required extra effort whenever the same APIs needed to be tested again.
I improved the collection by organizing requests into logical folders, using meaningful request names, and replacing hardcoded values with Postman variables for reusable data.
For example, instead of manually updating an authentication token or user ID in multiple requests, I stored them as variables and reused them across the collection.
This made the API testing workflow easier to maintain, reduced manual mistakes, and allowed the team to execute related API tests more efficiently.
Postman API Testing Checklist for Beginners
Before considering an endpoint tested for your required scope, check:
- correct HTTP method
- correct endpoint
- parameters
- headers
- request body
- authentication
- authorization
- expected status
- important response values
- required fields
- negative cases
- boundary cases
- reusable variables
- request dependencies
- repeatable assertions
Frequently Asked Questions
What is API testing with Postman?
It means using Postman to send API requests and validate status codes, returned data, headers, authentication, errors, and expected business behavior.
Is Postman good for beginners?
Yes. Its visual interface can help beginners understand requests and responses before they start building more complex automated workflows.
How do I test a REST API with Postman?
Create the correct request, add required headers, parameters, authentication or body data, send it, inspect the response, and add assertions for expected behavior.
Can Postman automate API tests?
Yes. Postman supports test scripts, collections, Collection Runner, command-line execution, and CI/CD integration.
What language does Postman use for tests?
Postman scripts use JavaScript.
What are Postman environments?
Environments group variable values so the same requests can run against different contexts such as testing or staging.
What is the difference between Postman CLI and Newman?
Both can execute Postman collections from the command line, but Postman CLI supports newer Postman capabilities and newer collection workflows that Newman does not.
Do I need coding knowledge to learn Postman?
Not initially. Basic JavaScript becomes useful when you begin writing assertions, processing responses, storing variables, and building automated workflows.
Final Takeaway
Learning API testing with Postman should not stop at clicking Send.
Start by understanding the expected API behavior. Then validate status codes and data, test negative scenarios, handle authentication, replace hardcoded values with variables, chain related requests, and run the collection repeatedly.
The most important QA skill is not memorizing every Postman feature.
It is understanding what the API should do, how it could fail, and what evidence proves that it is behaving correctly.
